Tomorrow will be my last "summer" organic vegetable delivery. I have not yet decided if I will sign up for the winter deliveries as the vegetable list includes a lot of things that I am not really fond of. Or as my mother would say "I'm not fussy about those". Okra, Kale, turnip greens, to name a few.
Maybe I should broaden my horizons? Any suggestions?
Here's a link to the winter delivery description:
Scott Arbor Farms
Enjoy the fall weather!
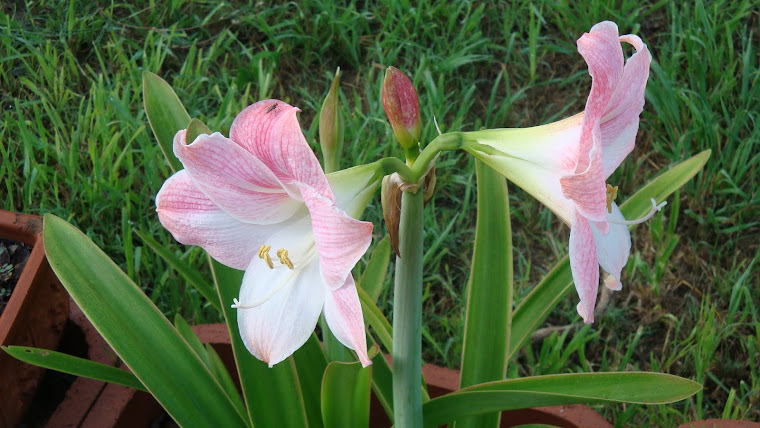
Winter narcissus flowers
Merry Christmas!
Friday, October 14, 2011


Sunday, September 25, 2011
Pear & dried Cherry sweet gallette

One of my favorite fall desserts to make is this recipe for a pear and dried cherry gallette, particularly now when the pears are filling the produce aisles and you can choose from many different types of pears. This pastry recipe works nicely with ripe juicy pears that give off a lot of gooey juice, as the dried cherries soak up quite a bit of the flavorful juice. This gallette recipe is actually quite easy to make. Sometimes, you may thing that it is not forming up exactly as you wish it to do (like it did for me today) but don't be afraid -- it always turns out fine, and you can't mess it up. Even if it looks a bit messy, it always tastes delicious.
Sweet pastry dough:
2 cups flour (use a soft flour, but not cake flour)
1/2 c butter (1 stick), cold but cut into about 8 chunks
1/2 c confectioner's (powdered) sugar
1 egg
To mix:
Using a Cuisinart with the knife blade attachment, pulse the flour and butter for a minute until the mix resembles coarse crumbs. (Alternately, you can cut in the butter and the flour with either 2 knives or with a pastry cutter). Add the powdered sugar and pulse once or twice. Add the egg and pulse until just mixed, do not overmix. You will have what looks like crumbs. Pour the crumbs into a bowl and knead a few times with your hands until you can form a ball. Flatten the ball into a round disc. Today I tried to make 3 smallish gallettes, so I made 3 smaller discs. Hint: it's easier to make this with only 1 disc, 1 pear gallette. I'm not sure why!! Wrap the disc (s) in plastic and chill in the fridge for 30 minutes or so.

Pear & Dried Cherry filling:
4 large firm but ripe pears, peeled and cut into 1/2 inch slices
1 cup dried cherries
1 Tbls cornstarch
1/4 cup sugar
1 tsp lemon juice
1 1/2 tsp cinnamon
Toss the pears and the next 5 ingredients in a bowl until well mixed. Let stand for 1 hour.


Have ready:
3 Tbls butter, softened
1 egg, beaten with:
2 Tbls water
1 Tbls sugar
Preheat the oven to 375F. Roll the pastry into a 12 inch circle on a floured piece of parchment paper. Trim the edges to be smooth and regular. Try to make sure that the disc of dough is of a uniform consistency. Spread 2 T of the soft butter onto the dough and spread in an 8 inch circle in the center of the disc. Spoon the pears and cherries in the center of the 8 inch circle, reserving the juices. (Or, if you made 3 small ones, roll each dough disc out to be a 6 inch circle, spread the butter on the inner 3 -4 inches, spread 1/3 of the pears/cherries onto each circle.) Fold the edge of the pastry up partially over the edge of the pear filling; pleating the pastry carefully. Try not to crack the pastry, particularly at the bottom of the gallette so that the juices will not leak out. Slide the pastry carefully (which is still on the parchment paper) onto a cookie sheet. Once you've carefully moved the pastry to the cookie sheet pour the reserved juices in the middle and top with the remaining 1 Tbls of butter.
Whisk the egg and the water in a small bowl. Carefully brush the exposed pastry with the egg wash, and sprinkle the washed pastry with 1 Tbls sugar on the edges.

Bake in the center of the oven for 40 to 50 minutes until pastry is golden brown and juices are bubbly. Don't worry if the juices leak out, I've never been able to make one with no leaked juices, but they still taste great! You can see from my picture that they didn't turn out as pretty as I would have liked, but they tasted great. Next time I make these, if they turn out prettier, I'll upload a better picture. You can see that I also ran out of parchment paper so I had to bake them directly on the jelly roll pan, and they did stick badly. Next time I won't forget!
Let stand to cool for 30 minutes and serve warm or cool. Warm, serve with ice cream, cold, serve with whipped cream.
Tuesday, September 20, 2011
Butternut Squash & Caramelized Onion Gallette

Butternut squash has been very plentiful lately, but recently I have become very tired of the usual: butternut squash soup, roasted butternut squash, or squash casserole. Yummy, all, but I was bored with the tried and true.
Happily, I found a recipe for a "Butternut Squash & Carmelized Onion Gallette" on a foodie site: http://smittenkitchen.com/2007/10/butternut-squash-and-caramelized-onion-galette/
With squash on the counter and few ideas, I decided to try the recipe. The pictures on the site of the dish weren't terribly inspiring but I thought, I'll give it a go.
It was delicious and very tasty, but I thought that I could make the recipe simpler and also make the gallette much prettier than the one on the site. See my finished product, above.
NOTES: you can use more or less squash, depending on what you have, but when I made the recipe once with only 1 medium sized squash, it wasn't as good as when I used 2 medium squash. Also, don't forget the sugar, I did, once, and it really made a difference!
Here's my recipe:
Butternut Squash and Carmelized Onion Gallette:
Ingredients:
For crust:
1 1/4 cups flour (I used unbleached whole wheat pastry flour, but any wheat flour will do)
1/4 tsp salt
1 stick (8 Tbs) very cold butter, cut into chunks
1/4 cup ice water (put an ice cube in a 1 cup liquid measuring cup, then fill with cold water up to 1/4/cup)
1/4 cup light sour cream
2 tsp fresh lemon juice (cut a lemon in half, dump the seeds and squeeze a teaspoon from each half)
For Filling:
1 large butternut squash OR 2 small butternut squash, peeled (I used a veggie peeler), seeded and cut into small, 1/2 inch chunks
2 Tbs olive oil
1 tsp salt
One very large white or yellow sweet onion (cut in half, then sliced very thin into half moon slices. The thinner the better)
2 Tbs butter (not margarine)
1/8 tsp sugar
2 tsps fresh sage, chopped fine
1/4 tsp cayenne pepper
3/4 cup baby swiss cheese (or fontina, or your favorite melting but strong cheese), cut into very small chunks or grated.
1) Mix pastry crust: Mix sour cream and lemon juice into the cold water, stir until no lumps of cream appear. Place flour, salt and butter chunks into a cuisineart with the sharp blade in the bowl. Pulse until the butter is incorporated and the flour is crumbly. (If you don't have a cuisineart, cut the butter into the flour/salt mix with a pastry cutter or 2 knives until crumbly). Pour the liquid into the cuisineart and pulse until all flour is wet, but DO NOT overmix. (By hand, pour liquid into a well in the center of the flour, mix with a fork making sure that all flour is wet, but don't over mix). Place in a plastic bowl, cover tightly with plastic wrap and refrigerate for an hour.
2) a: Make squash filling: Preheat oven to 375F. Mix squash chunks with the olive oil to coat, sprinkle on the 1 tsp salt. Line a flat pan or sheet with either foil or parchment paper, and layer the chunks in one layer on the pan. Roast in oven for 30 to 40 minutes, until fork tender but not too soft. Roast longer with bigger chunks, less time with smaller chunks.
2) b: Caramelize the Onions: Melt 2 Tbs butter in a medium frying pan, then add the onions. Over medium heat, cook the onions, stirring often, until they are nicely browned and caramelized. Add sugar, cayenne pepper and sage. Leave onions in frying pan but remove from heat.
3) When squash is done, remove from oven and dump the squash into the unheated frying pan with the onions and spices. Stir to mix the onions carefully with the squash. Add the cheese and mix to incorporate all the items evenly. ( I prefer to sprinkle the cheese onto the top of the mound of squash before making the dough border, then the cheese melts down into the squash).
4) Form pastry crust: Place the cold pastry dough on a well floured very flat surface, turn to coat well with flour, and form with your hands into a round flat disc, about 5 inched wide and 1 inch in depth. Roll dough into a uniformly flat 12 inch circle. Try to make sure that your edges are not too flat, roll from center out and don't press too hard as your rolling pin gets to the edges. Turn dough over at least once as you roll, and continue dusting with flour so it doesn't stick to the rolling pin or surface. Dough will snap back a bit, so if you make an edge too thin or raggedy, push the edge in towards the center with your fingers and lightly roll over the edge to make uniform.

5) Preheat oven to 400F. Place a piece of parchment paper about 12 inches square on a flat cookie sheet. Fold dough in half, then in half again (triangle shaped) and carefully place on the parchment paper, placing the point of the folded dough exactly in the center of the paper. Unfold the dough carefully, stretching if needed to make a good circle.

Here's what it should look like before baking, below:

7) Bake @ 400F 30 to 40 minutes until golden brown. Remove from oven and cool for 5 to 10 minutes. Remove from sheet onto a plate. To serve, cut in wedges. Can be either reheated in a hot oven (10 minutes) or microwaved later. Enjoy!
Saturday, August 20, 2011
Chinese long beans and squash casserole....oh and Melons!
Today's organic produce delivery (I subscribed to an organic weekly delivery, see last week's post for details about Scott Arbor Farms www.scottarbor.com) came to me with a big bag of 2 Honeydew melons...and the yard long beans with which I have fallen in love. Also 2 nice butternut squash, another burpless cuke and some various colored peppers and more shallots. Oh and a large Tatume and a small yellow squash. I plan to make the yard long beans using a Chinese stir fry recipe and a squash casserole, using the yellow and tatume squash and onions (maybe some cheese, too?) See recipes below the pictures...

I cut up all the rest of the squash, peppers and onions along with a couple of potatoes and I have them marinating in the fridge in my favorite roasted vegetable marinade (see my post a few weeks ago for that recipe). Tomorrow I'll have baby back ribs and roasted veggies. Right now, hubby and I are typing away on the laptops and munching from a shared bowl of melon...Yum!
Squash saute with onions, sweet peppers and cheese:
2 to 3 pounds summer squash (yellow, tatume, zucchini)
1 to 2 Tbls olive oil (if you aren't afraid of the fat, and like the flavor, use bacon fat, my favorite for taste!)
2 small shallots, chopped
1 small red or yellow sweet pepper, seeds and membrane removed, diced.
1 clove garlic, peeled and smashed
salt and pepper to taste
1/4 to 1/2 cup shredded cheese (swiss, cheddar, parmesan, whatever you have!)
1) Rinse squash. Scrape or cut rind off of squash if using squash with a heavy rind (tatume: I used a carrot peeler), and cut zucchini and yellow squash into 50 cent size pieces, tatume into 3/8 inch thick (or thinner) squares or rounds. Try to make the pieces uniformly thick/thin so that you don't have overcooked and undercooked pieces once they are done. Since zucchini and yellow squash cook faster, I cut them into slices with a knife, not too thin. I used a mandoline to slice the tatume squash very thin.
2) Measure fat or oil into pan, heat, and stir fry the onions and sweet pepper until limp, about 3 to 5 minutes. Add smashed garlic piece.
3) Add squash to pan and stir fry until fat is uniformly spread out over squash. Sprinkle salt and grind fresh pepper over squash, cover and reduce heat to low. Cook, stirring occasionally 8 to 15 minutes until done. (Cook more if you made your squash pieces thick, cook less if you cut them very thin.)
4) Uncover pan, stir squash and sprinkle cheese over squash. Cover and cook for a minute or 2 more just to melt the cheese.
Chinese Long Beans:
1 to 2 pounds Yard Long Beans, rinsed and cut into2 to 3 inch pieces
1 Tbls peanut oil
1Tbls garlic, chopped
1 Tbls ginger root, chopped
2 scallions (green onions) white and light green parts only, chopped
1 Tbls soy sauce
1/2 tsp sugar
1/4 tsp salt; pepper to taste
1/2 tsp chili paste (or a few sprinkles of ground chili powder)
1 Tbls peanut oil
1) Heat 1 Tbls oil and stir fry beans (keep them moving with 2 spoons) until shriveled/puckered, anywhere fro 5 to 15 minutes, depending on their thickness and your "done" preference. Remove beans from pan to serving dish.
2) Heat 1 Tbls oil and add garlic, ginger and scallions. Stir fry less than a minute, then add chili. Return beans to pan, add the rest of the ingredients and stir fry until most of liquid has been absorbed and beans are heated through.
Enjoy!

I cut up all the rest of the squash, peppers and onions along with a couple of potatoes and I have them marinating in the fridge in my favorite roasted vegetable marinade (see my post a few weeks ago for that recipe). Tomorrow I'll have baby back ribs and roasted veggies. Right now, hubby and I are typing away on the laptops and munching from a shared bowl of melon...Yum!
Squash saute with onions, sweet peppers and cheese:
2 to 3 pounds summer squash (yellow, tatume, zucchini)
1 to 2 Tbls olive oil (if you aren't afraid of the fat, and like the flavor, use bacon fat, my favorite for taste!)
2 small shallots, chopped
1 small red or yellow sweet pepper, seeds and membrane removed, diced.
1 clove garlic, peeled and smashed
salt and pepper to taste
1/4 to 1/2 cup shredded cheese (swiss, cheddar, parmesan, whatever you have!)
1) Rinse squash. Scrape or cut rind off of squash if using squash with a heavy rind (tatume: I used a carrot peeler), and cut zucchini and yellow squash into 50 cent size pieces, tatume into 3/8 inch thick (or thinner) squares or rounds. Try to make the pieces uniformly thick/thin so that you don't have overcooked and undercooked pieces once they are done. Since zucchini and yellow squash cook faster, I cut them into slices with a knife, not too thin. I used a mandoline to slice the tatume squash very thin.
2) Measure fat or oil into pan, heat, and stir fry the onions and sweet pepper until limp, about 3 to 5 minutes. Add smashed garlic piece.
3) Add squash to pan and stir fry until fat is uniformly spread out over squash. Sprinkle salt and grind fresh pepper over squash, cover and reduce heat to low. Cook, stirring occasionally 8 to 15 minutes until done. (Cook more if you made your squash pieces thick, cook less if you cut them very thin.)
4) Uncover pan, stir squash and sprinkle cheese over squash. Cover and cook for a minute or 2 more just to melt the cheese.
Chinese Long Beans:
1 to 2 pounds Yard Long Beans, rinsed and cut into2 to 3 inch pieces
1 Tbls peanut oil
1Tbls garlic, chopped
1 Tbls ginger root, chopped
2 scallions (green onions) white and light green parts only, chopped
1 Tbls soy sauce
1/2 tsp sugar
1/4 tsp salt; pepper to taste
1/2 tsp chili paste (or a few sprinkles of ground chili powder)
1 Tbls peanut oil
1) Heat 1 Tbls oil and stir fry beans (keep them moving with 2 spoons) until shriveled/puckered, anywhere fro 5 to 15 minutes, depending on their thickness and your "done" preference. Remove beans from pan to serving dish.
2) Heat 1 Tbls oil and add garlic, ginger and scallions. Stir fry less than a minute, then add chili. Return beans to pan, add the rest of the ingredients and stir fry until most of liquid has been absorbed and beans are heated through.
Enjoy!
Saturday, August 13, 2011
Local Summer squash
Today, just after I had picked up my weekly organic produce delivery, I met a friend and gave away the eggplant, the basil and some peppers before I had a chance to take a photo of this week's vegetables.
Next week my plan is to take a picture before giving half away! The weekly delivery has proven so bountiful that I am forced to give a lot away -- Dan & I can't eat it all. Tonight we will have the tatume squash, the cucumber and the peppers; I think I'll give the butternut to my daughter to fix this week. Next week I should get a melon or 2! I was disappointed that we didn't receive any of the yard long beans, those were scrumptious.
For those who haven't read my blog before, I signed up and paid a group of local organic farmers for a weekly stash of summer organic vegetables and sometimes melons each Saturday morning. The produce is fresh, local, organic, and delicious. Sometime in September or October, we can sign up for the winter produce, which of course I plan to do.
By the way, for those who live in the San Antonio area, the group that delivers the produce can be reached at: Scott Arbor Farms

Next week my plan is to take a picture before giving half away! The weekly delivery has proven so bountiful that I am forced to give a lot away -- Dan & I can't eat it all. Tonight we will have the tatume squash, the cucumber and the peppers; I think I'll give the butternut to my daughter to fix this week. Next week I should get a melon or 2! I was disappointed that we didn't receive any of the yard long beans, those were scrumptious.
For those who haven't read my blog before, I signed up and paid a group of local organic farmers for a weekly stash of summer organic vegetables and sometimes melons each Saturday morning. The produce is fresh, local, organic, and delicious. Sometime in September or October, we can sign up for the winter produce, which of course I plan to do.
By the way, for those who live in the San Antonio area, the group that delivers the produce can be reached at: Scott Arbor Farms

Monday, August 8, 2011
Summer bounty & Roasted vegetables

Here's my favorite roasted vegetable recipe:
Rinse and cut into large chunks any combination of sweet peppers, onions, potatoes (any kind: yams, new, yukons) squash, zucchini, carrots, baby corn. Remove the seeds from the peppers. Chunks should be anywhere from 1 to 2 inches in diameter, but try to keep them all uniform, with the exception of zucchini and squash which you should cut a bit larger than the rest, as they cook faster.
Marinade:
1/3 cup sherry
1/4 cup soy sauce
1/4 cup balsamic vinegar
1/4 cup honey (or brown sugar)
5 or 6 sun dried tomatoes, soaked and chopped
Mix the marinade ingredients in a large plastic baggie that can be sealed, or place in a large resealable leftover container (ziplock bags or tupperware). Add all the veggies into your bag or container and marinade for at least 8 hours, but overnight is better.
Preheat oven to 350F (190C) Cover the bottom of a large roasting pan with parchment paper. If you don't have a roasting pan, a jelly roll pan (a cookie sheet with sides) or a lasagne pan works fine. Place the veggies in the pan in one layer, without overlapping any veggies, and toss the marinade down the drain.
Roast for 45 minutes to 1 hour until all the veggies are nicely browned and soft. If the veggies were cut smaller, they may be done in less time; larger veggies, more time. Turn the veggies after about 30 minutes to roast all the sides of the pieces.

Saturday, August 6, 2011
Blueberries! Muffins and Pie....

Blueberries are in season now - sweet, tangy and full of antioxidants. Blueberry crumble, blueberry pie, blueberry muffins, blueberry clafouti....make your favorite now! The cold winter with lots of rain, followed by a long cool spring and finally a hot summer, helped the berries to ripen beautifully and they are so good right now.
When fresh blueberries are in season, I like to buy lots of them. I keep a few (of the biggest) on the table for snacking, bake a few into my favorite pastry, and freeze the rest. Blueberries freeze wonderfully - just don't wash them to death. Rinse them lightly, and dry completely before bagging and freezing.
When I was growing up in Seattle, my father kept 2 large blueberry bushes in the back yard. He had to drape a net of sorts over the tops of the bushes to keep the birds from stealing the bounty. During the season, if I had a hankering for blueberries, I'd go out back, stick my head under the net and pick the berries and eat them right off the bush. Then I'd pick a cup or so to use in making blueberry muffins. Here's my favorite recipe for blueberry muffins:
Blueberry muffins:
Preheat oven to 400F (200C)
Mix together in a large bowl:
1 3/4 cups flour
1/3 cup sugar (or half sugar/half Splenda or Stevia)
3/4 tsp salt
2 tsps Baking powder
Beat in a small bowl:
2 eggs
Add to the eggs:
3/4 cup milk or buttermilk (or use 1 cup plain yogurt)
NOTE: 1/4 cup melted butter if using buttermilk or yogurt, increase sugar to 1/2 cup
1/4 cup melted butter
Combine the liquids into the dry ingredients with a few folding strokes. After one or 2 strokes,
Add:
1 full cup fresh Blueberries
Important: Do not overmix, or else muffins will be tough. It's ok to have lots of lumps.
Place paper muffin cups into the muffin pan OR liberally grease the cups. Blueberries are notoriously sticky and juicy, it is recommended to spray the muffin cups with nonstick spray. Fill the muffin cups 3/4 full with dough. NOTE: if a crumble topping is desired, make the crumble topping for the pie recipe, below, and divide evenly among the muffins, placing the crumbs on top of each muffin.
Bake for 20 to 30 minutes, depending on size of muffin. Makes 12 medium or 6 very large muffins.

To keep the sugar calories low, use half sugar and half Splenda or Stevia mixed with the berries and the topping. Small amounts of cinnamon and lemon zest add a bit of punch to the flavor. I prefer a pie with a crumble crust, and to make it healthy, I use whole wheat pastry flour and rolled oats with either hemp seeds or flax meal.

Berry antioxidants and Omega 3's in a dessert! you can't beat that for taste and health.
Blueberry Pie with crumble topping:
Sweet pie pastry:
2 cups flour
1/2 cup (1 stick) butter
1/2 cup confectioner's sugar
1 egg
Using a food processor with the knife blade attached, process the flour and the butter until coarse crumbs are formed. Add the sugar and pulse briefly. Add the egg and pulse just until mixed, do NOT overprocess. Pour the crumbs into a bowl and knead briefly until a ball forms. Dough should be soft but not sticky. NOTE: if you are using older or very dry flour, you may need to add a few drops of water but only to make the ball form. Wrap ball in plastic and refrigerate for about 30 minutes.
Filling:
5 cups blueberries, picked over and lightly washed and drained
3/4 cup sugar (OR 1/4 & 1/8 cup sugar with 1/4 & 1/8 cup Splenda or Stevia)
1/3 cup flour
2 tsp grated lemon zest
Crumble topping:
2/3 cup brown sugar (packed)
3/4 cup rolled oats (OR 1/2 cup rolled oats & 1/4 cup Flax meal & 1/4 cup Hemp seeds)
1/2 cup whole wheat flour (or whole wheat pastry flour)
1/2 tsp cinnamon
6 to 8 tablespoons butter (not margarine)
Preheat oven to 375F (190C).
Directions:
Crust: Place a large square of parchment paper (12 inches square or bigger) onto a level surface. Place chilled pie crust in the middle of the square and rolling out from the center, evenly roll crust to fit your pie pan. Lift the parchment paper and crust from one end and fold in half. Lifting the folded crust from the parchment paper, carefully place onto the half of the piepan, then carefully redrape the folded half onto the rest of the pan. Smooth down into the pan, being careful not to tear the crust. Cut the edges uniformly and using your fingers, fold the edges of the crust under and pinch to form a design that will hold the juices into the pan. NOTE: if your pie pan tends to stick to crusts when cooked, make a parchment layer for the pie pan. Cut 2 parchment paper rounds, 1 round about 1 inch bigger than your pie pan circumference, the smaller one, the same as the bottom of the pan. Fold the bigger one in half and then in half again, and snip the 4 folded edges with scissors about half way to the middle. Place in the pie pan, folding the snipped parts over each other to fit. Place the small one in the bottom of the pan. Carefully drape the crust over the paper and cut the edges of the paper to fit the pan after you've formed the crust edges.
Filling: mix all the ingredients for the berry filling in a medium size bowl and pour into the pie crust filled pan.
Crumble topping: Place all ingredients into the same medium bowl that you used for the berry filling. Microwave for 20 to 40 seconds to melt the butter, watching carefully to not over cook! mix thoroughly with a spoon or fork. Crumble the topping over the berries in the crust, evenly distributing over the top of the berries.
Bake: 40 to 50 minutes in preheated center of the oven, until browned on top and crust appears lightly browned and done. Cool over a wire rack at least 30 minutes before serving. Serve with vanilla ice cream or whipped cream.

-----====----
Blueberry pie takes a lot of berries (5 cups!) and is best with a very sweet dough but with not too much sugar mixed in with the berries.
To keep the sugar calories low, use half sugar and half Splenda or Stevia mixed with the berries and the topping. Small amounts of cinnamon and lemon zest add a bit of punch to the flavor. I prefer a pie with a crumble crust, and to make it healthy, I use whole wheat pastry flour and rolled oats with either hemp seeds or flax meal.

Berry antioxidants and Omega 3's in a dessert! you can't beat that for taste and health.
Blueberry Pie with crumble topping:
Sweet pie pastry:
2 cups flour
1/2 cup (1 stick) butter
1/2 cup confectioner's sugar
1 egg
Using a food processor with the knife blade attached, process the flour and the butter until coarse crumbs are formed. Add the sugar and pulse briefly. Add the egg and pulse just until mixed, do NOT overprocess. Pour the crumbs into a bowl and knead briefly until a ball forms. Dough should be soft but not sticky. NOTE: if you are using older or very dry flour, you may need to add a few drops of water but only to make the ball form. Wrap ball in plastic and refrigerate for about 30 minutes.
Filling:
5 cups blueberries, picked over and lightly washed and drained
3/4 cup sugar (OR 1/4 & 1/8 cup sugar with 1/4 & 1/8 cup Splenda or Stevia)
1/3 cup flour
2 tsp grated lemon zest
Crumble topping:
2/3 cup brown sugar (packed)
3/4 cup rolled oats (OR 1/2 cup rolled oats & 1/4 cup Flax meal & 1/4 cup Hemp seeds)
1/2 cup whole wheat flour (or whole wheat pastry flour)
1/2 tsp cinnamon
6 to 8 tablespoons butter (not margarine)
Preheat oven to 375F (190C).
Directions:
Crust: Place a large square of parchment paper (12 inches square or bigger) onto a level surface. Place chilled pie crust in the middle of the square and rolling out from the center, evenly roll crust to fit your pie pan. Lift the parchment paper and crust from one end and fold in half. Lifting the folded crust from the parchment paper, carefully place onto the half of the piepan, then carefully redrape the folded half onto the rest of the pan. Smooth down into the pan, being careful not to tear the crust. Cut the edges uniformly and using your fingers, fold the edges of the crust under and pinch to form a design that will hold the juices into the pan. NOTE: if your pie pan tends to stick to crusts when cooked, make a parchment layer for the pie pan. Cut 2 parchment paper rounds, 1 round about 1 inch bigger than your pie pan circumference, the smaller one, the same as the bottom of the pan. Fold the bigger one in half and then in half again, and snip the 4 folded edges with scissors about half way to the middle. Place in the pie pan, folding the snipped parts over each other to fit. Place the small one in the bottom of the pan. Carefully drape the crust over the paper and cut the edges of the paper to fit the pan after you've formed the crust edges.
Filling: mix all the ingredients for the berry filling in a medium size bowl and pour into the pie crust filled pan.
Crumble topping: Place all ingredients into the same medium bowl that you used for the berry filling. Microwave for 20 to 40 seconds to melt the butter, watching carefully to not over cook! mix thoroughly with a spoon or fork. Crumble the topping over the berries in the crust, evenly distributing over the top of the berries.
Bake: 40 to 50 minutes in preheated center of the oven, until browned on top and crust appears lightly browned and done. Cool over a wire rack at least 30 minutes before serving. Serve with vanilla ice cream or whipped cream.

Subscribe to:
Posts (Atom)